
A repeatable 8-item roofing estimate conversion checklist is the fastest way to raise your close rate from the industry average of 15–27% toward the top-quartile range of 35–45%. The eight items are: verified square count, pitch and complexity multiplier, named material bundle with warranty tier, separate tear-off line, defensible labor math, missed add-ons, a 15–25% gross margin markup, and a signed line-item document with change-order rules. Your immediate next step: send an itemized 12-line estimate within four hours of the inspection and schedule a follow-up call within 48 hours. Contractors who track lead value per estimate quickly discover that a higher close rate is worth more than any single upsell.
- Verified square count with documented measurement method
- Pitch and complexity multiplier applied before pricing
- Named manufacturer and product tier (GAF, Owens Corning, CertainTeed)
- Tear-off and disposal as a separate line item
- Labor math: burdened wage × hours-per-square × pitch adjustment
- Missed add-ons: flashing, skylights, decking allowance, ventilation
- Markup that secures 15–25% gross margin plus permit and sales tax
- Signed estimate document with explicit change-order clause
Table of Contents
- What does your roofing estimate conversion checklist actually include?
- How do you build a defensible line-item roofing estimate?
- How should you present the estimate so homeowners actually sign?
- What follow-up cadence and objection scripts actually reduce ghosting?
- Which KPIs tell you if your estimate process is actually working?
- Key Takeaways
- Why most contractors underestimate the estimate itself
- Resultsdigitalus helps roofing contractors close more of what they estimate
- Useful sources
What does your roofing estimate conversion checklist actually include?
Every high-converting estimate shares the same eight building blocks. Here they are in checklist form, ready for your estimator to run on every job.
- Labor calculation: Use the formula: burdened wage × hours-per-square × pitch productivity adjustment. Missing fall-protection setup time per OSHA 29 CFR 1926.501 can skew labor by 20–40%.
- Markup: Apply your markup to total direct costs (materials + labor + tear-off + add-ons) to land at a customer-facing price that protects a 15–25% gross margin, per SimplyWise’s contractor estimating guide.
- Signed estimate document: Include acceptance language, a change-order clause with per-sheet decking pricing, and a payment schedule. Per Roofing Brief, the estimate is the customer-facing record. Scope and price must not change at the proposal-to-contract handoff.
Trust signals to include in every estimate packet: your state contractor license number, a current Certificate of Insurance (COI), your manufacturer certification (GAF Master Elite, Owens Corning Preferred, or CertainTeed SELECT ShingleMaster), and three recent references.
Pro Tip: Require homeowner sign-off on the estimate before you convert it to a contract. Add one sentence: “Acceptance of this estimate confirms scope and price. Any field changes require a signed change order.” That single line prevents most post-job disputes.
How do you build a defensible line-item roofing estimate?
Step 1: Measure and convert to squares
Three measurement methods are standard for residential roofing. Use aerial/satellite reports (EagleView, RoofSnap, Hover) as your default for speed and documentation. Drone flyovers add value on complex hip-and-valley roofs where satellite resolution is limited. On-roof manual measurement remains the cross-check method when report accuracy is in question.
Convert the footprint to squares using the pitch surface multiplier, then add your waste factor: 10–12% for simple gable roofs, 15–20% for complex hip/valley configurations, per SimplyWise.
Step 2: Price the material bundle
Specify the manufacturer and product tier. GAF’s Timberline HDZ, Owens Corning’s Duration, and CertainTeed’s Landmark Pro each carry different warranty structures that affect your workmanship warranty offer. Include starter strip, hip and ridge cap, and waste in your material order math. Leaving those out of the estimate is one of the four red flags that signals a low-quality bid to informed homeowners, per the Roofing Brief estimate breakdown.
Step 3: Price tear-off and labor separately
| Line Item | Quantity | Unit | Notes |
|---|---|---|---|
| Tear-off (single layer) | 27 sq | Per square | Includes sweep, load, dumpster |
| Tear-off (two layer) | 27 sq | Per square | Add 40–60% labor vs. single |
| Install labor (8/12 pitch) | 27 sq | Per square | Burdened wage × hours-per-sq × pitch productivity adjustment |
| Fall-protection setup | 1 job | Flat fee | OSHA 29 CFR 1926.501 compliance |
| Decking repair | Per sheet | Per sheet | Fixed rate, not “as needed” |
For a 27-square roof at 8/12 pitch with a three-person crew: multiply your burdened hourly wage by hours-per-square for that pitch, then multiply by 27 squares. Add a flat fall-protection setup charge. That number is your labor line before markup.
Step 4: Apply markup and build the 12-line document
Apply your markup percentage to total direct costs. The 12 standard lines every estimate must carry, per Roofing Brief:
- Tear-off and disposal
- Decking repair allowance (per-sheet rate)
- Drip edge
- Underlayment
- Ice and water shield
- Starter strip
- Field shingles (named manufacturer, product, color)
- Hip and ridge cap
- Step and counter flashing
- Ventilation (ridge vent, box vents)
- Labor (installation + fall-protection setup)
- Permit and sales tax
Pro Tip: Always show decking repair as a fixed per-sheet rate, not “as needed.” A blank-check allowance destroys homeowner trust and opens the door to disputes. Set the rate upfront and let the field crew document sheets replaced.
For a deeper look at standardizing your estimating workflow, the construction estimating process guide from R Construction Solutions covers operational best practices that translate directly to roofing.
How should you present the estimate so homeowners actually sign?
Three-tier pricing anchors the middle option
Structure every proposal as Good / Better / Best. The Good tier covers code-minimum materials and a standard workmanship warranty. Better hits the mid-grade manufacturer product with an enhanced warranty. Best uses the premium product line with the full manufacturer system warranty. Research on the 3-tier proposal structure consistently shows that 60–70% of buyers choose the middle option when the tiers are framed correctly.
What homeowners need to see before they sign
A homeowner comparing three bids is not comparing prices. They are comparing confidence. Your estimate document needs to show: manufacturer name and product line, warranty details (manufacturer material warranty vs. your workmanship warranty), a project timeline with milestones, a payment schedule with a reasonable deposit (10% or $1,000 minimum, whichever is greater), and a clear statement on who pulls the permit.
“A proper quote specifies roof covering type, manufacturer, color, whether it’s tear-off or overlay, cleanup, and who pays permit fees. Big price spreads often reflect differences in scope, warranty, or excluded items — not contractor quality.” — FirstRoofGuide
Use this comparison framework during client calls to explain price spreads:
| Variable | What it means | Why it affects price |
|---|---|---|
| Shingle tier | Good / Better / Best product line | Material cost difference of $15–40/sq |
| Underlayment | Felt 30 vs. synthetic | Longevity and labor difference |
| Ice and water shield | Code minimum vs. full coverage | Material and labor add-on |
| Tear-off vs. overlay | Full removal vs. layer-over | Tear-off adds labor and disposal cost |
| Decking repair pricing | Per-sheet rate vs. “as needed” | Transparency vs. surprise charges |
| Warranty tier | Manufacturer system vs. material-only | Workmanship coverage difference |
Send a follow-up email within four hours of the inspection. Include a photo of the measured roof, the three-tier proposal PDF, and a link to your project photo portfolio so the homeowner can see finished work before they decide.
What follow-up cadence and objection scripts actually reduce ghosting?
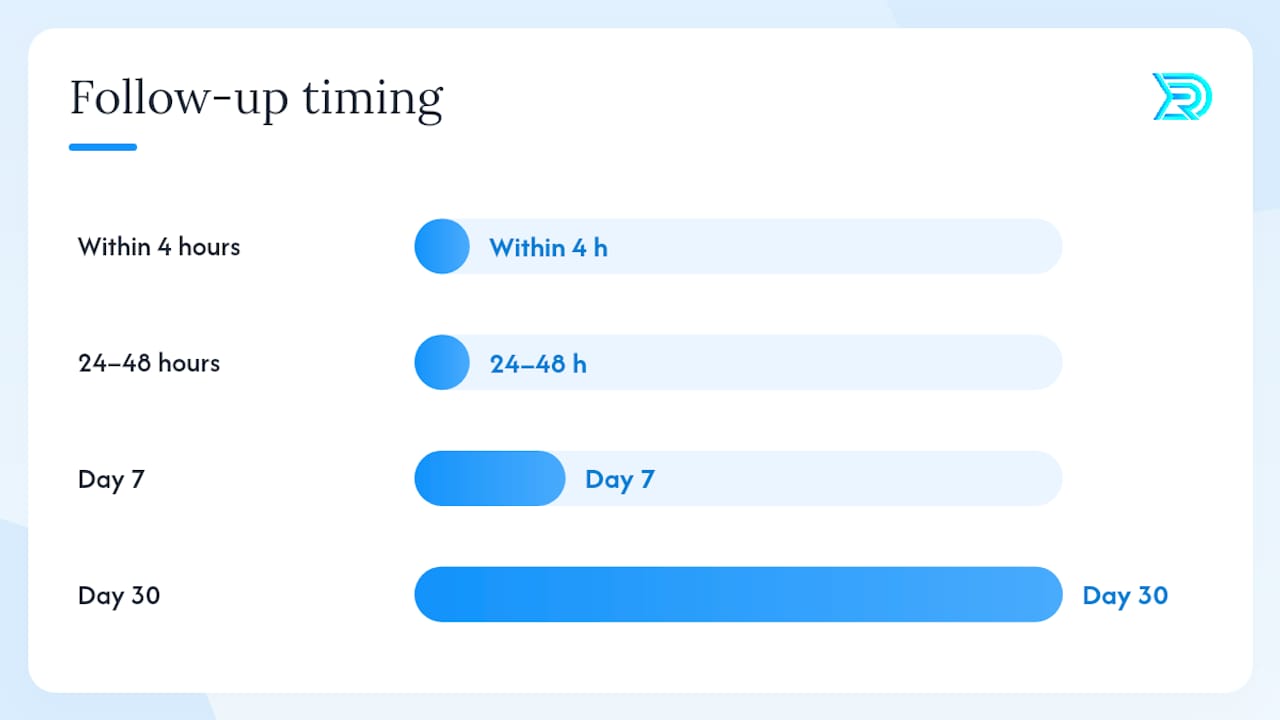
Ghosting after an estimate is a communication problem, not a price problem. A structured 3-touch follow-up within 48 hours raises conversion rates substantially.
Recommended cadence:
- Within 4 hours: Email the estimate PDF plus a short text confirming delivery. Subject line: “Your [City] roof estimate from [Company Name] — 3 options inside.”
- 24–48 hours: Phone call. Leave a voice message if no answer. Offer to walk through the estimate line by line.
- Day 7: Re-engagement email with a 72-hour price-lock offer or a small decision bonus (gutter cleaning, ridge vent upgrade).
- Day 30: Final check-in. Ask if they have questions or if the project timeline changed.
Objection scripts:
- “Your price is too high.” — “I understand. Let me show you exactly what’s in each line. The difference between our bid and a lower one is usually the underlayment spec, the decking repair rate, or the warranty tier. Want me to walk through it?”
- “I need more quotes.” — “Absolutely. When you compare, ask each contractor for their 12-line breakdown and the manufacturer name on the shingle. That’s the only apples-to-apples comparison.”
- “I’m not ready yet.” — “No problem. I’ll hold this price for 72 hours. After that, material costs may require an adjustment.”
- “Do you offer financing?” — “Yes. I can include payment options in the proposal. Many homeowners prefer 12-month same-as-cash.”
Verification checklist to send in your trust packet:
- State contractor license number (with verification link)
- COI showing general liability and workers’ comp
- Manufacturer certification (GAF, Owens Corning, or CertainTeed)
- Permit responsibility statement (“We pull all permits”)
- Three references with project type and contact info
Protect your margin during negotiation by comparing scope line by line rather than offering a percent discount. Payment-term flexibility (extended payment schedule) costs you less than a 5% price cut and closes more deals.
Which KPIs tell you if your estimate process is actually working?
| KPI | What to track | Target |
|---|---|---|
| Estimates issued | Count per week/month | Baseline, then trend up |
| Signed contracts | Count per week/month | Track against estimates issued |
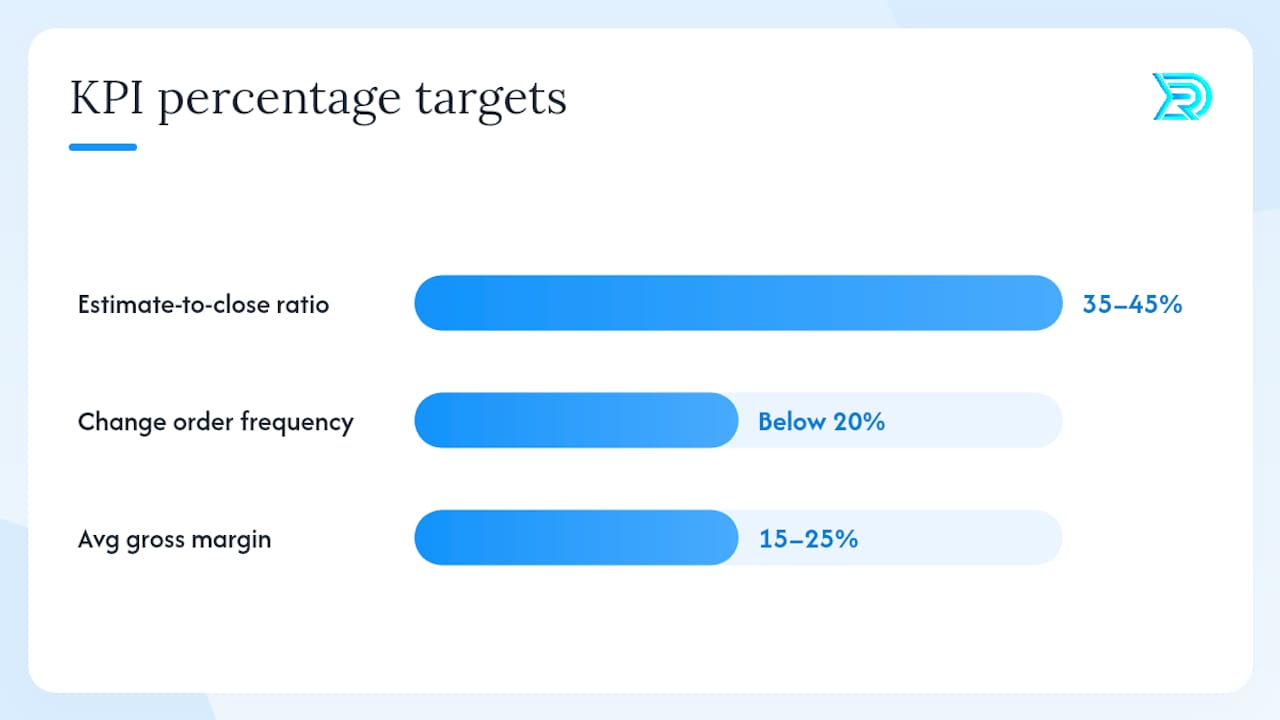
| Estimate-to-close ratio | Signed ÷ issued | 35–45% top quartile |
| Avg. lead response time | Hours from inquiry to estimate sent | Under 4 hours |
| Change order frequency | % of jobs with a change order | Below 20% |
| Avg. decking change order | $ per sheet, per job | Consistent with quoted rate |
| Avg. gross margin per job | (Revenue – direct cost) ÷ revenue | 15–25% minimum |
Run simple A/B tests on your proposal format: send single-tier estimates to one batch of leads and three-tier proposals to another over a 30-day period. Track close rate and time-to-sign. Most contractors who run this test see the three-tier format outperform single-tier within the first 10–15 estimates, consistent with the 90-day close rate system framework.
“CRM usage, fast follow-up, and structured sales processes explain most of the gap between contractors closing 15% of estimates and those closing 45%.” — RoofPredict
For measurement, EagleView, RoofSnap, and Hover all integrate with common CRM and estimating platforms. The workflow that works: measurement provider feeds square count into your estimating tool, estimate generates a proposal PDF, homeowner signs via e-sign, and the CRM logs the outcome. Every step tracked means every KPI is real. Contractors who skip the CRM are flying blind on their close rate. For a broader look at where estimate conversion fits into your lead funnel, the common roofing marketing mistakes guide covers the upstream errors that reduce estimate volume before you even get to close rate.
Also worth reviewing: the estimating checklist for general contractor projects from R Construction Solutions, which covers template standardization that applies directly to roofing office workflows.
Key Takeaways
A standardized 12-line estimate with a signed acceptance clause, a 3-tier proposal structure, and a 4-hour follow-up rule are the three changes that move most contractors from a 15–27% close rate toward the 35–45% top-quartile range.
| Point | Details |
|---|---|
| Standardize the 12-line template | Use all 12 standard line items on every estimate to prevent scope disputes and lowball comparisons. |
| Use 3-tier pricing | Good/Better/Best framing pushes 60–70% of homeowners to the middle option, protecting your margin. |
| Follow up within 4 hours | A structured 3-touch cadence within 48 hours is the single biggest driver of close rate improvement. |
| Track close rate weekly | Measure estimates issued vs. signed contracts; top performers hit 35–45% estimate-to-close. |
| Resultsdigitalus | Resultsdigitalus builds the SEO, paid ads, and website infrastructure that feeds higher-quality leads into your estimate pipeline. |
Why most contractors underestimate the estimate itself
The conventional wisdom in roofing sales is that the follow-up is where deals are won or lost. That’s only half right. A weak estimate document creates the objections that follow-up then has to overcome. When a homeowner receives a single-number bid with no line items, no manufacturer name, and no warranty detail, they have no choice but to compare on price alone. You’ve handed the lowest bidder the win before you’ve even made your call.
The contractors who consistently close at 40% or above are not better salespeople. They send estimates that answer every question before the homeowner thinks to ask it. The 12-line structure, the named manufacturer, the per-sheet decking rate, the explicit change-order clause: each one removes a reason to hesitate. By the time the follow-up call happens, the homeowner is not deciding whether to trust you. They already do.
The ethical dimension matters too. An estimate that changes scope or price at signing is not a negotiating tactic. It’s a credibility-destroying bait-and-switch that generates chargebacks, disputes, and bad reviews. The estimate is the record. Hold it.
Resultsdigitalus helps roofing contractors close more of what they estimate
More estimates in your pipeline only matter if your close rate is worth the volume. Resultsdigitalus is a veteran-owned digital marketing agency built exclusively for roofing, siding, and gutter contractors across the United States. We run SEO for roofers, Google Ads, Meta Ads, and custom WordPress website design engineered to generate leads that are already pre-qualified before they request an estimate.

We helped a Florida roofing company scale from 3 crews to 18 and sell for $60 million. The lever was not just more leads. It was better leads entering a tighter estimate-to-close process. Our exclusivity model means we work with one roofing company per market, so your campaigns never compete against a contractor we also serve. No long-term contracts. If you want to know what your current estimate pipeline is worth and where the conversion gaps are, request a digital marketing audit and we’ll map it out.
Useful sources
- How to dramatically improve roofing estimates (Roofing Brief – estimate template)
- How to estimate a roofing job: contractor guide (SimplyWise)
- How to compare roofing quotes (FirstRoofGuide)
- New roof estimate breakdown (Roofing Brief)
- How to dramatically improve roofing estimate-to-close ratio (RoofPredict Blog)
- The 90-day roofing close rate system (Axionis)
- How to stop ghosting after first estimate (RoofPredict Blog)
